For this Tutorial we will be using
only PSP and the filters that come with it!
NO Outside Filters are used for this tut and
no supplies are needed
This Tutorial was Written By me on 01/27/09 in PSP V9
any resemblance to any other on the internet is
simply a Coincidence
I also do not claim any rights to the "techniques"
used in this tutorial
Feel Free to share my tutorials with others please
do not copy and claim as your own
1. ) Open a New Image 800x800,
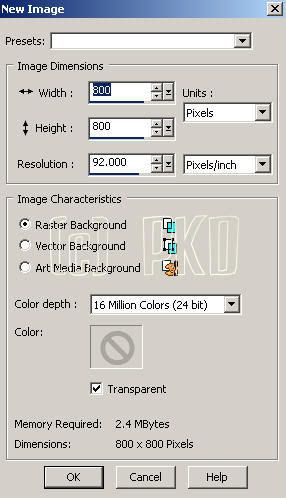
Decide on 3-4 Colors you would like for your kit
I am using 4 Colors:
#497177
#27aabd
#75d8e7
#dbf5f9
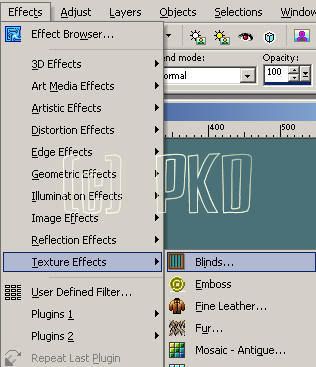
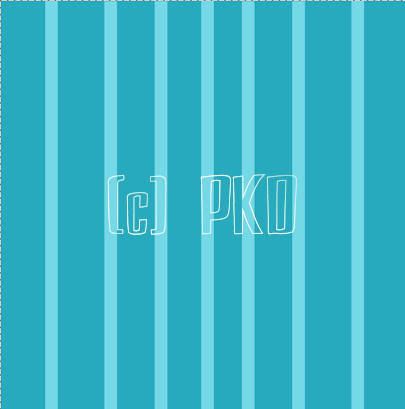
2.) We will make this first paper a simple texture
Flood Fill with one of the colors you have Chosen,
I am Using #497177,
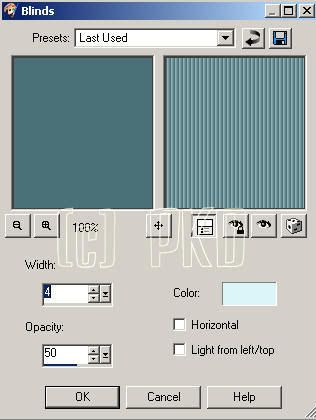
1st go to effects/Texure Effects/Blinds:
SETTINGS:
The Go to effects/Texture Effects/Texture
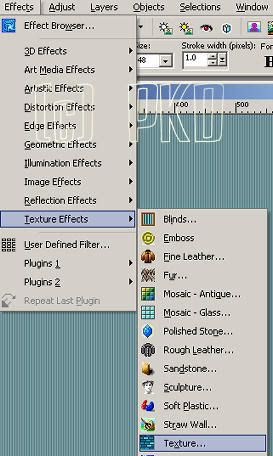
SETTINGS:
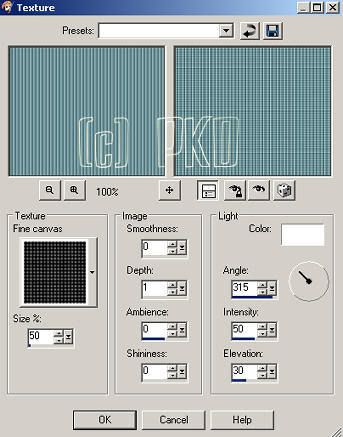
** Feel Free to play around with the textures till you find something
Last rename this layer "Paper 1"
2). Add a New Raster Layer and Flood Fill with Color of Choice
I am Using : #27aabd
Ok Lets make this one a Striped Paper
Select your Pen tool
and Set your Forground to color of choice
( I am using #75d8e7 )
and your background to null
and use these settings (or Feel free to play around with Settings)
Ok, you may want to zoom out a bit
starting at around 50-100 pixels Draw a Straight Line
from the Top of your Paper to the Bottom
go to layers/convert to raster layer
then edit/copy Then edit/paste/as a new selection
and place where you would like the Stripes to be
repeat as needed then Layers/ Merge/Merge Down
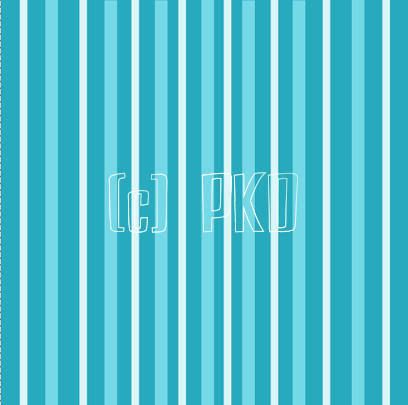
you should now have something similar to mine
Ok, back to your Pen tool Changing your Foreground color
I am using #dbf5f9 and the Line Width to 15.00
and repeat as stated above filling in more stripes :o)
Layers/Merge/Merge down
Then Rename this Layer "Paper 2"
Should Look something Like this
* I also Add the Same Texture to this as I did for Paper 1
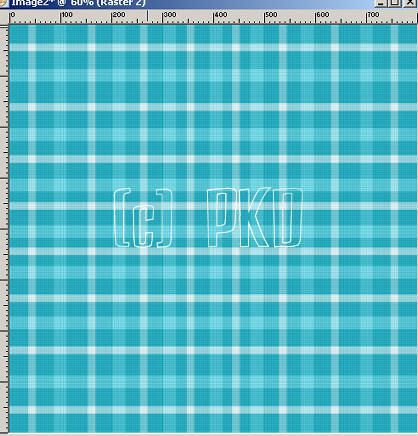
3.) Ok Lets make this one a Plaid Paper
Duplicate Paper 2 Layer 2 times
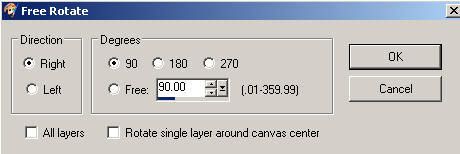
working on the top layer go to image/Rotate/Free Rotate
settings:
then Lower the Opacity of this layer to about 60%
Layers/Merge/Merge Down
Rename this Layer Paper 3
Paper 3 should Look Something Like this:
4. Ok for the last one let make a retro looking paper
add a New Layer fill with color I am Using #dbf5f9
then select you preset shapes tool change your forground to
color of choice and background to null settings:
then Draw some Random Shapes changing colors and Line width as need
till you like what you see then Convert to raster layer
layers/merge/merge down
Rename Layer to Paper 4
this is how mine looks:
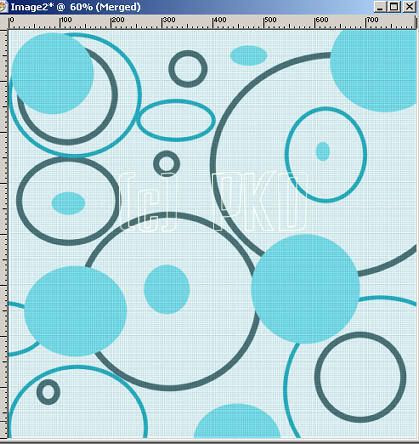
*Note again I added the same texture
5.) You Should Now have 4 Layers Named
Paper1, Paper 2, Paper 3 and Paper 4

Ok then you can save each Paper individually in .png or jpg
or leave as it is and save as an psp image :o)
Hope you enjoyed this tutorial!
No comments:
Post a Comment